InfoMommy is blogging about her experiences, doing product reviews & giving you her take on things in the world! She's blogging about things that might never have crossed your mind, or that solidifies what you were already thinking. She may even blog about something that you completely disagree with or find udderly (pun intended, LOL) ridiculous! She even hopes to make you chuckle!
Friday, July 4, 2014
Road Trip Doodling To The Rescue!
With summer here and road trips on the go, there are 2 books that I am confident will rescue you (and your children) once the dreaded "Are we there yet?" questions start setting in. They are also perfect for a rainy day, or those moments when your kids start saying "I'm bored!".
DK Books has released 2 doodle books this year that are perfect to allow your kids to use their imagination and creativity. Both feature dry erase markers that allow kids to wipe their books clean and start the fun all over again! My First Doodle Fun and My First Doodle On The Go are not only well priced, making them accessible to everyone, but they really are fun for the whole family! These board books ensure that they can be held and used comfortably in their laps while in the car or elsewhere, and are chock full of ideas to get their creativity flowing.
I am always trying to reduce the time my kids spend on electronics, and these books are a great way to do it! They won't even realize that they aren't playing their favourite video game or watching a DVD!
Both books contain 26 pages and start off with the page "This Book Belongs To:", allowing your kids to practice writing their names and has a picture frame where kids can doodle in their own rendition of what they look like. This will lead to all kinds of hilarity! They can decorate or add on to a fish, a rocket ship, flowers, fairies, animals and pets along with a whole slew of other engaging ideas. There are plenty of seasonal pages like designing their own ice cream cones or a snowman, and they can draw a number of crazy faces. My son loves this page in particular and the silliness is contagious! There is a page dedicated to numbers and even a section on where they live, allowing them to work on learning their address. There are also 2 pages of art frames where they can create their own art show and 2 pages for free doodling.
You do have to keep your eyes on them when they are using these, as the dry erase marker is not washable. It would be nice to see DK Books come up with a washable and scent free marker for future editions.
These books are geared to kids 0-5yrs, but everyone in the family can join in. We have done it ourselves! They are wonderfully geared to kids of all genders and incorporate not only fun, but self expression, reading, writing and numbers.
This is already a hit and will be travelling with us everywhere this summer, and likely until the books wear out, which based on their sturdiness, will be a long, long, time.
Both these books retail for $8.99CAN at full price, but you can currently get them from DK Books' Summer Fun Boutique for only $6.29CAN each!
Happy road tripping!
***** These views are mine, and mine alone. As with anything, you are responsible for assessing whether this item and/or activity is safe and suitable for your specific needs. InfoMommy does not make any warranties of any kind, expressed or implied, and assumes no responsibility and/or liability for any actions taken as a result of this blog post.*****
Sunday, June 15, 2014
Bust Out Your Legos with The Lego Play Book!
In a day and age where kids are plugged into anything and everything, this is a great way to get back to the simple things in life. A life where kids (and/or adults! LOL) use their own imagination and creativity to make something with their own hands and minds. Not something that is created with a keypad, a mouse, or a finger swipe! (Not that that is always bad either!)
This is also a great book to bond over, because let's face it - we all need more reasons to sit down with our kids and spend more quality time as a family. Life is short and they don't stay kids forever. Even if you yourself vow and pledge to be a kid forever! LOL
While I wish that the book included the build instructions for each one, I love that there is a trouble shooting page which answers questions such as what to do if you don't have a speicifc piece, what you can build based on what kind of bricks you have, in addition to what you can build based on time you have available. Additionally, Ialso like section that breaks down the various Lego pieces, such as moving pieces and SNOT pieces. (For the record, they are not booger pieces, LOL they stand for Studs Not on Top!)
In addition to the instructions for each build, I would have liked to see a number of options that are more traditionally female. Seeing that most of the content is traditionally male oriented, it would be nice to see more variety in builds catering to all genders, allowing you as the buyer , to make the most of the book no matter the gender of you kids, or what your child(ren)'s interests might be.
Though this book is geared towards kids ages 7-15yrs, it can easily be used by children potentially as young as 4yrs, assuming they have some help and guidance from adults. And it can always be used by adults of any age too! :)
Lego Play retails for $24.99CAN
***** These views are mine, and mine alone. As with anything, you are responsible for assessing whether this item and/or activity is safe and suitable for your specific needs. InfoMommy does not make any warranties of any kind, expressed or implied, and assumes no responsibility and/or liability for any actions taken as a result of this blog post.*****
Friday, May 23, 2014
Preserve It!


making nature's bounty last so that my family can all enjoy the tastes and health benefits of locally grown fruits, vegetables, meats and other goodies found at farmers' markets.When I asked DK Books to review Preserve It!, I thought that I was going to get a book on canning - and I did. But the book surprised me with a whole other realm of information, like all the different ways you can preserve. From smoking to freezing and even clamping! Now there's one that I've never heard of before. (It's a technique where you would insulate root vegetables outside.)
This book gives you so much information in its 352 pages. There are lots of big colourful pictures and the information is laid out into sections and recipes to make it simple and easy for those who have little experience preserving. (Like me!)
You will find recipes on how to blanch vegetables for the freezer, make a variety of pickles, relishes, jellies & jams, and you will also learn how to make your own ketchup and other sauces. You will learn how to preserve with oil, alcohol, and by smoking various meat, poultry, nuts and yes - even vegetables! There are also recipes for dry curing meat, making your own sausages and your own wine. Yum!
You will find a lot of recipes for well-loved favourites, along with quite a few unique recipes like Pea Pod Wine, Rhubarb and Rose Petal Syrup for sparkling water or ice cream, and Rosemary Jelly to name a few.
You can currently order this book and many others from DK Books' May Food & Drink Boutique at a savings of 30% off for a limited time!
Now that strawberries will be ready soon, I'm debating on what to try first from this book: strawberry freezer jam, frozen fruit bars, or strawberry syrup with vanilla to add to ice cream, or to drizzle over sliced fresh strawberries and whipped cream! And best of all? It's made with your own tender loving care - and way healthier than store bought!
Happy summer (Ok - spring!) everyone!
***** These views are mine, and mine alone. As with anything, you are responsible for assessing whether this item and/or activity is safe and suitable for your specific needs. InfoMommy does not make any warranties of any kind, expressed or implied, and assumes no responsibility and/or liability for any actions taken as a result of this blog post.*****
Wednesday, April 30, 2014
Let Your Cupcakes & Muffins Ride in Style!
I love spreading the word on products that I love, and this one definitely takes the cup"cake"! Next time you
need to transport cupcakes or muffins, considering using Fox Run's smartly designed Cupcake Carousel!
It is adorable with its BPA-free sturdy giant cupcake design, and is wonderfully functional. It has 3 stacking trays holding 8 cupcakes each, allowing you to compactly and fashionably transport up to 2 dozen fully decorated cupcakes! Each tray has a handle which makes it simple to pull out of the carrier, as well as easy to manoeuvre while you're placing it on a table or other surface. These removable trays also double as display stands. What's not to love?!
Each cup cavity is deep, ensuring that your cupcakes do not tip over, and the semi-transparent lid allows you and others to appreciate the beauty you put into your treats. The handle on the lid and the carrier's four strong snap locks ensure that your carrier will stay locked and keep your delicacies undisturbed during travel or storage.
The Cupcake Carousel is available in Red, Hot Pink & Brown. Retail price in Canada is approximately $25-$30, depending on where you shop. It is 14" in diameter and 11" high.
I used this for the first time to transport the Paw Patrol themed cupcakes with tie-dyed icing I made for my son's birthday. I loved it so much that I think my friends just might have thought that I was a paid spokesperson for this product! (For the record, I am not at all! LOL) I just really thinks it's a great, innovative product!
If you want tips on making your own tie-dyed frosting, watch this 4-minute Rachel Ray episode clip featuring
Cake Boss' Buddy Valastro. That's where I got my idea for the frosting. It's so easy to do and looks so unique, and is made with just a simple buttercream icing recipe. (You could probably cheat and use store-bought too!) Now, clearly I didn't make a whole cake like they did, I just got the tie-dyed icing all set in my piping bag and went to town frosting the cupcakes. So easy, and my son was overjoyed with the final product!
As a side note, the toothpicks with the Paw Patrol characters fit on the top layer while transporting them as I only needed enough cupcakes to fill 2 inserts, allowing for extra room at the top of the carrier. If I had of required a full 2 dozen cupcakes, then I simply would have brought the toothpick Paw Patrol pictures with me and popped them in the top of the cupcakes once I got to where I was going. But there is more than enough room for all the tiers to have fully frosted cupcakes while stacked in the Cupcake Carrier, just not with the actual toothpick embellishment during transport when fully loaded.
If you are looking for great Paw Patrol decoration ideas, visit the Nickelodeon Jr website. Knowing full well that this new show is taking off, they've offered everyone a whole slew of printable decorations and ideas in the meantime, until they can manufacture their own licensed products for sale. Best of all, it's FREE!
So let your cupcakes and muffins ride in style in the Cupcake Carousel! You put so much love and effort into making them, showcase them like the awesome treats that they are!
***** These views are mine, and mine alone. As with anything, you are responsible for assessing whether this item and/or activity is safe and suitable for your specific needs. InfoMommy does not make any warranties of any kind, expressed or implied, and assumes no responsibility and/or liability for any actions taken as a result of this blog post.*****
Thursday, April 24, 2014
Ride & Relax in This Awesome Little Tikes Wagon!
Now that spring is finally upon us, I want to share a product with you that I think is awesome! The Little Tikes Ride & Relax® Wagon is every parent's dream for a children's wagon, and is the epitome of practicality and fun! The most exciting and unique feature on this wagon is that with a simple flip of 1 side of the wagon, it instantly transforms into a bench!
It's suitable for children approximately 18 months to 10 years of age, and comes with 2 seatbelts. It features QuietRide wheels, which are not completely silent but are much quieter than some wagons and other ride ons out there. It also has 6 cup holders, which is perfect for hot days when you want extra drinks with you to keep everyone hydrated.
In the middle section of the wagon, you can either flip up the flaps to create seats or keep the flaps closed and use it as a storage place or cooler. The kids can sit in it no matter which way you want it! When the flaps are in the seated position, the flaps provide great back support to the kids sitting in the wagon, and allows their feet to rest on the bottom. When using as a cooler, you will appreciate the drain plugs in the bottom for easy drainage and cleaning.
Once you are done using it as a children's wagon, you can actually use it as a flatbed utility wagon to haul items around your yard, etc. With a weight limit of 250lbs, most can easily take a seat and rest
In the middle section of the wagon, you can either flip up the flaps to create seats or keep the flaps closed and use it as a storage place or cooler. The kids can sit in it no matter which way you want it! When the flaps are in the seated position, the flaps provide great back support to the kids sitting in the wagon, and allows their feet to rest on the bottom. When using as a cooler, you will appreciate the drain plugs in the bottom for easy drainage and cleaning.
Once you are done using it as a children's wagon, you can actually use it as a flatbed utility wagon to haul items around your yard, etc. With a weight limit of 250lbs, most can easily take a seat and rest
on the wagon themselves while the kids play. It also allows for your older child to sit on the wagon along with your little one. I know my bigger child was excited about this as he has been told that he's too big for our former wagon. Not to mention how much stuff you could haul around once it's a flatbed with this higher weight limit. The wagon itself weighs 32lbs and is easily cleaned with soap and water.
The extra long handle can effortlessly be folded underneath the wagon to allow for better storage and transport. Some of these Ride & Relax wagons come with an umbrella that attaches to the side to assist with sun protection. Mine didn't come with this feature, so I cannot speak to how sturdy the umbrella would be in windy conditions. But it is a fabulous idea to help keep the little ones out of the sun. You will also find some reflective decals with your package to affix to the corners of the wagon to assist in making it a bit more visible in lower light conditions.
It took me about an hour in total to assemble, however I'm quite confident that it would take someone experienced assembling these items about 30mins or so. I usually leave tasks like this to my husband, but this time, I wanted to see how long it would take the average Mom to assemble.
In Canada, this wagon retails for approximately $130, and the Deluxe version with the Umbrella retails for approximately $150.
The only thing I think it's missing is locks for the wheels, as you have to be cautious that the wagon doesn't roll or blow away with you, being that it is such a smooth ride. That and maybe a cold drink or two! :)
Happy spring everyone!
***** These views are mine, and mine alone. As with anything, you are responsible for assessing whether this item and/or activity is safe and suitable for your specific needs. InfoMommy does not make any warranties of any kind, expressed or implied, and assumes no responsibility and/or liability for any actions taken as a result of this blog post.*****
Saturday, April 19, 2014
Show Me Your Paw Patrol Cookie Badge!
Sometimes, you just need to be rescued..... Sometimes it's for something serious, and sometimes it's to make your child's birthday dreams come true. The Paw Patrol gang are usually the ones that do the rescuing, but this time, it was CheapCookieCutters.com!
This show, which is on TVO here in Canada, and Nick Jr in the U.S., is loved by my son with a capital L! Being that it's a brand new program, it is very difficult to find anything that is legitimately Paw Patrol, except for craft sites like Etsy. Add to that a child's birthday party theme request and we have a celebratory dilemma.
I went online searching for badge cookie cutters as I wanted to fabricate a Paw Patrol logo for his cake or make decorative cookies as part of the loot bags. I found only 2 websites offering a badge. One was out of stock, and the other was CheapCookieCutters.com!
I contacted them, and got a very prompt response. I had it shipped to me and voila - Paw Patrol themed cookies by InfoMommy were born - thanks to the creativity of those at CheapCookieCutters.com! (And to the inventor of edible icing! Without that, my son's beloved Chase the dog picture would never have been featured on the cookie! LOL)
I went online searching for badge cookie cutters as I wanted to fabricate a Paw Patrol logo for his cake or make decorative cookies as part of the loot bags. I found only 2 websites offering a badge. One was out of stock, and the other was CheapCookieCutters.com!
I contacted them, and got a very prompt response. I had it shipped to me and voila - Paw Patrol themed cookies by InfoMommy were born - thanks to the creativity of those at CheapCookieCutters.com! (And to the inventor of edible icing! Without that, my son's beloved Chase the dog picture would never have been featured on the cookie! LOL)
CheapCookieCutters.com has over 2,000 cookie cutters available and if you are searching for something that they don't actually have, you can customer order! How paw-riffic is that? They guarantee to ship within 2 business days and are made in the U.S., giving you great quality. Almost all of their cookie cutters are made of steel plated tin and are sturdy and a pleasure to use.
If you are looking for something unique, or for your run of the mill cookie cutter design, consider CheapCookieCutters.com. If you are searching for all things Paw Patrol for a party, check out the Nick Jr website. They have all sorts of printables that you can use to plan and decorate. While your child might think that these adorable puppy characters are heroic, he or she will think you are the real hero!
Ingredients
- 3/4 cup Butter, softened
3/4 cup Granulated sugar
1 Large egg
1 tsp Vanilla
2 cups All-purpose flour (I use whole wheat flour)
1 tsp Baking soda
1tsp Cream of tartar
1/4 tsp Salt
1/4 tsp Ground cardamom (optional)
Directions
Cream margarine and sugar in large bowl. Add egg. Beat well. Add vanilla. Beat until smooth.
Combine remaining 5 ingredients in small bowl. Add to margarine mixture in 2 additions, mixing well after each addition until no dry flour remains. Divide dough into 2 equal portions. Shape each portion into flattened disc. Wrap each with waxed paper. Chill for at least 6 hours or overnight.
Discard waxed paper from 1 disc. Roll out dough on lightly floured surface to 1/8 inch (3 mm) thickness. Cut out circles with lightly floured 2 inch (5 cm) cookie cutter. Roll out scraps to cut more circles. Arrange about 2 inches (5 cm) apart on greased cookie sheets.
Bake in 350°F (175°C) oven for about 10 minutes until edges are just golden. Let stand on cookie sheets for 5 minutes before removing to wire racks to cool. Cool cookie sheets between batches. Repeat with remaining disc. Yield: Approximately 7 dozen cookies.
***This sample product was provided free of charge. ***** These views are mine, and mine alone. As with anything, you are responsible for assessing whether this item and/or activity is safe and suitable for your specific needs. InfoMommy does not make any warranties of any kind, expressed or implied, and assumes no responsibility and/or liability for any actions taken as a result of this blog post.*****
Monday, March 31, 2014
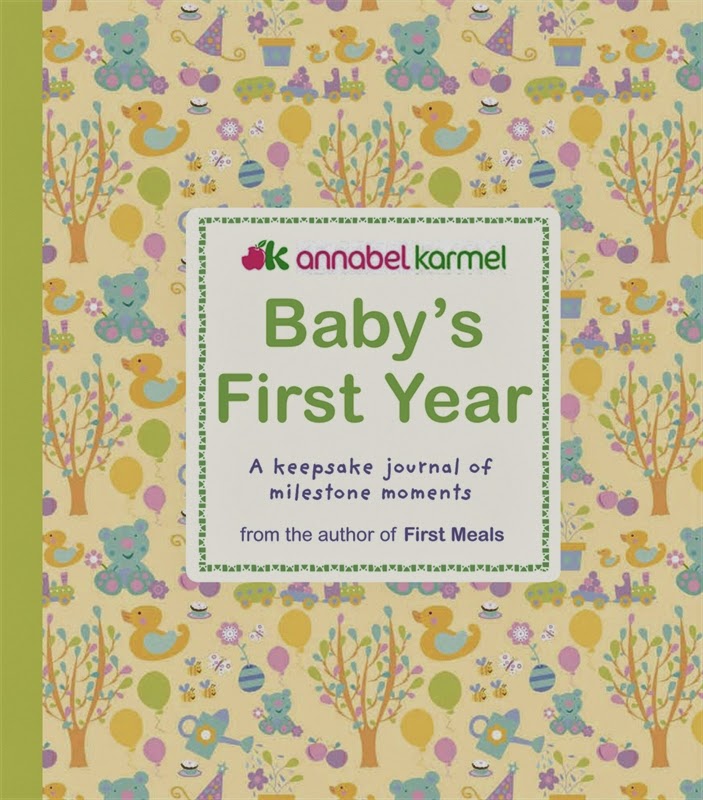
Annabel Karmel Fans Will Love Her Memory Book for Babies!
Annabel Karmel, the famed
author of recipe books for babies starting solids, has yet another great book on
the market! Introducing Baby’s First Year - Memories forLife!
I have used several of her cookbooks in the past to help guide starting my baby on solids, but I never
knew she had a memory book! I have been recording all of my 2nd
child’s stats and firsts in a scrapbook, however this memory book would have
made things so much easier, and nicer!
First off, it’s hardcover,
which is great for this type of keepsake. It’s got entries for all of the
typical stats one would expect to find, and others that are special too! It
allows you to keep detailed records of the birth, what was happening in the
world on the day he or she was born, as well as all the usual monthly
milestones. There is even a section to document the baby’s family tree! You can find many spots to attach photographs,
and there is also an adorable little envelope to put your baby’s first locks of
hair, etc...
Its beautiful images are
appropriate for either gender, and are abundant throughout the book. It also includes
a beautiful yellow ribbon to mark your spot as you work on documenting your
little one’s firsts. If you are having a Baptism or other religious commemoration,
or if you want to document their 1st Christmas, there is a spot for
that too! And the same for his or her 1st
birthday!
And another great feature?
Annabel Karmel shares some of her recipes in the book, notably her Dark and
White Chocolate Cupcakes that are suitable for your little one’s 1st
birthday party!
Whether you yourself are expecting, looking to document your baby’s 1st year, or simply searching for a baby shower gift, this is one memory book that keeps on giving. Visit DK Book's April Boutique for more pregnancy & baby titles! 30% Off for a limited time!
***This sample product was
provided free of charge.
If you have a product that you’d like InfoMommy to consider for review, please contact us.
***** These views are mine, and mine alone. As with anything, you are responsible for assessing whether this item and/or activity is safe and suitable for your specific needs. InfoMommy does not make any warranties of any kind, expressed or implied, and assumes no responsibility and/or liability for any actions taken as a result of this blog post.*****
Wednesday, March 26, 2014
Diary Of A Burger & A Home Birth!
It all started the day before
on Saturday, in the early morning after we’d discussed going to Five Guys
burger joint for lunch, and picking up a few items at Walmart, including a
school bag for our oldest child. We had
decided to go there because not only does Five Guys make a great burger, but
Walmart was in the same area. My husband was out jogging, and some Jehovah’s Witness
ladies came by the house, asking if I wanted to talk to them. Hiding my belly
behind the door, I told them that I had a new baby in the house and that I’d
kindly prefer it they’d not return. I told that little fib because they caught
me off guard. I didn’t want to offend
them, and didn’t know how to politely ask them not to return on such short
notice. That was the first thing that popped into my prego mind. What I didn’t
know, was that there really was going to be a new baby in the house within less
than 24 hours, beginning minutes after they left!
A little after the Jehovah’s
Witness ladies stopped by, I started spotting and had some cramping. I was
super curious if this meant that things might actually finally be starting
after being convinced that he might be a few weeks early. I was also a bit
scared. I was hesitant to let my aunt know, as she had been planning on
attending the birth, and I had given her a few false starts along the way. My
husband came home, and once I told him what might
be going on, he wanted to know if we were still going to go to Five Guys for a
burger. (What can I say? He’s the kind of guy who doesn’t worry about things
until they are actually here and happening, plus I’d given him many false
starts too! And let’s not forget that they really do make a great burger!)
At first, I was too scared to
go, as I dilated quite quickly with our 1st, and wasn’t keen on
taking a chance driving some distance down a country road for a burger, and
delivering in a corn field. So I said no, I wasn’t leaving home & started
scrubbing the windows around the house to give myself something to do. I was
starting to get antsy about it being the real thing & couldn’t just sit
around. I needed something to do. I had the occasional cramping & contraction,
and this went on until lunch time. My hunger and craving for that burger got the
best of me, as did the need to get out and do something. I could not sit still.
Things weren’t progressing, so we left. We got ½ way there, when I got a
relatively strong contraction. My husband was going to turn the car around to
go home, but I didn’t get another one, so I told him to keep on trucking to
Five Guys.
We arrived there for our lunch,
had a great burger as always. Our eldest had his usual grilled
cheese with tomato. He had no idea that he was soon about to get a little
brother with his combo too!
Once satiated with the yummy
taste of a good burger, we were walking out the door of the restaurant, & I
got a strong contraction. This one was really strong, and I knew this time that
it must be legit. While at Walmart, I started having stronger and more regular
contractions and was using the cart to hold myself up and focus on breathing.
Being the bargain hunter that I am, and feeling more confident about being in
labour, I told my husband that I wanted to go to Winners to see if I could get
an even better price on a school bag. We went over there, and found no deal on
a school bag. But, our oldest found the toy section. So I took my
contractions and hung out there for a bit while my husband looked for socks and
underwear. (I’m guessing he thought he was going to crap himself at the home
birth! LOL). Of all the times…
When we got home, which was
almost around dinner time, I decided that I was not cooking dinner. Who was I
kidding?! I love to cook, but no one needs to know that we ordered out a lot during
this pregnancy because I was so exhausted and had been quite sick during the
pregnancy with a variety of ailments. (Most of which our eldest generously
brought home from school.) One of those ailments was a really bad chest &
sinus infection over the Christmas and New Year holidays that we all had, which
resulted in a multitude of trips to the doctor, and to see the midwives (whose
office had caught on fire over the holidays and had to be re-located! We were
all so sick, that we didn’t notice any of the signs all over the building
letting us know this on the way up to the office, and didn’t realize this until
we walked into the door of the suite, and smelled old smoke and saw blower fans
spread out throughout the hallways! So I
spent the next couple of weeks having my check-ups done on a lawn chair in
another suite to make do until their office was repaired. What are the odds?!
You just can’t make this stuff up!). Now back to dinner! We ordered chicken for dinner. (My choice. My
husband knew better than to mess with a pregnant lady’s cravings and food
choices, and he likes it too!)
My contractions were getting a
lot stronger and a lot more frequent throughout dinner, which I was trying to
keep hidden from our eldest child. You see, we needed him to be none the wiser,
so that he would fall asleep like any normal night and hopefully not wake up
until after the birth. If he knew, he would have been too excited to sleep! My
aunt arrived at about 10pm, and our primary midwife arrived around midnight. The
secondary midwife was to attend closer to the delivery time. The contractions
were quite strong at that point, coming about every 5-7 minutes or so. At around 2am, they were slowing down. I had
thought that he would have arrived by then (one can hope, right?!), so I sent my
husband to bed, just in case he was not born throughout the night. My husband
would need energy to take care of all of us, should I still be labouring
throughout the day on Sunday.
Our midwife suggested breaking
my water to get things going, but I was too nervous to do so, and decided to go
for a walk around the block with my aunt. I had done all kinds of little things
around the house that whole time, like laundry, etc, and walked around the
house, but I needed room to move. So out we walked at about 3am under light
snowflakes that were falling. Speaking of falling, my aunt joked as we walked, that
if she needed to, she would use our neighbor’s pickup truck with the snow plow
on the end to push me back to our house if I was about to give birth on the
street.
Once we got back to the house
at about 4am or so, my contractions were coming on faster, harder, and
longer. Our midwife checked me & I
was 5cms dilated. She thought the baby might be here by 7am! They were getting
harder and harder to deal with, and seeing as I had planned on delivering upstairs
in the tub for a water birth, our midwife thought it would be a good idea to have
my aunt go upstairs and start filling the tub. This way, I could get into the
water to help with the pain and have me there so I could deliver when the time
came. So up goes my aunt to wake up my husband and start the tub, when the
contractions were beginning to get unbearable. After a particularly bad one
just before 5am, I knew that I had to get up the stairs fast before the next
one came, or that I’d have to deliver right there in the living room. I told my
midwife & up I “ran” to the
master bathroom, and leaned over the bathroom counter while the tub was filling.
(I am saying “ran” loosely here!)
I asked my husband to plug in
my CD player for my relaxation music that I downloaded previously for the
birth, because I had really wanted music to help me relax during my 1st
birth too, but that didn’t happen. So I was really looking forward to having
the music this time around and spent a lot of time downloading all kinds of
great calming music. I remember hearing my husband say that there were no
available plugs in the bathroom and that he was going to plug it just outside
the bathroom door in our bedroom. Unfortunately I was having a contraction that
was so strong that I couldn’t talk, but I could
think, and I remember thinking “Hey man, unplug the stupid electric toothbrush,
then we’ll have an available plug!” But
see, my husband knew better than I that the baby was coming a lot quicker that
I realized. He remembered the sound of my contractions from our 1st birth when
I was about to deliver & knew it was very close. He knew there would be no
music again this time either, but was not about to tell me that!
The next contraction I got was
so bad that it made me feel like I was going to throw up in the sink. Our
midwife asked me if I was having rectal pressure, and I remember wondering why
she’d be asking me that question, because we were not that close to delivering.
Well, when the next contraction hit seconds later, I felt the urge to push HARD!
I remember yelling something to the effect of “Oh my God, I have to push NOW!
And I’m NOT joking!”. (Like they would actually have thought I was kidding!)
They offered to get me in the
tub or onto the bed. The urge to push was too intense & came on so fast
& so strong that I had no choice but to drop myself slowly to the bathroom
floor, so I could continue pushing. I
remember holding onto the counter trying to dig in my finger nails and
scratching down the side of the bathroom cabinets on the way down, (like you’d
see in a horror movie) while someone took off my pants & underwear. In
hindsight, it would have been a good idea to wear something like a nightgown,
but for some reason, that had never occurred to me. At some point our midwife paged the secondary
midwife to let her know it was time!
Someone put blankets under my
head to partially prop me up & I started pushing. The secondary midwife
hadn’t arrived yet & things progressed quickly, so my aunt and my husband
had to step in as the honorary midwives! Thank God we’d put a sound machine in our
eldest’s bedroom to help him sleep if things got loud, because I couldn’t hold
back. I remember yelling and screaming so loud at the top of my lungs, thinking
that I was for sure going to wake him up and he’d have to see me give birth! I
didn’t want to be doing that, but I couldn’t control myself. My body took over
and did what it needed to do, regardless of what I was thinking to myself! The
contractions were so intense, and I remember my midwife yelling over me
(because I was so loud!) to remind me to breathe in between contractions, but
the contraction just kept going, and going and going! I remember thinking that
I wanted my midwife to just stop talking as I found it so distracting, even
though she was only trying to help. But my aunt tells me that I actually said
that out loud! (Oops! I’ve never been good at keeping my mouth shut! I tend to
speak my mind whether someone wants to hear it or not, and I stayed true to
form during labour too!)
From the time I got to the
bathroom floor, I only had to push 3 times to get him out & he was born after
only 5 minutes of pushing! (Thank God!) He had some meconium in his amniotic
fluid & pooped on my shirt while I was holding him. (Little did we know
that he would soon become the kind of
pooer that people should stand back from, pooing up curtains and across the
room!) I can’t say I blame him though. If someone told me that I would have to
make a journey like that, I’d poo in my pants too! Anybody would! I guess
there’s a reason why babies don’t remember anything! LOL
The secondary midwife, arrived minutes after
the birth. Someone (I think it was us after our walk) had left the door
unlocked and she was able to come right in & up to our room. (Thankfully a serial
killer didn’t descend on our neighborhood that night! We might've scared him
straight if he’d of come in during all that!)
Now, our eldest somehow managed to sleep
through my entire ruckus and woke up around 6am to a brand new little brother! How
he slept through all that, I’ll never know! I’m just so glad he did! No sense
scarring him with that visual for the rest of his life!
What a cute little baby he was! (And still is!)
We were all so excited to finally meet him, and his older brother was over the
moon for him! I remember that our newborn cried a couple of times with me when
we were still upstairs in the bed, while our eldest was downstairs. He would
come running upstairs protectively, demanding to know what was wrong and why his
little brother was crying! It was such a great experience to give birth to him
at home, in a calm, warm & loving (ok, & LOUD!) environment, surrounded
by family and our lovely midwife. Thankfully it was winter, as if it had of
been during the summer, I would have probably had some windows open, and
someone would likely have called the cops from all the screaming! If we ever
sell this house, I hope there is no need for the new homeowners to use Luminol
in our master bathroom! That’s all I can say! (Ok, it wasn’t really that bad of
a mess).
***** These views are mine, and mine alone. As with anything, you are responsible for assessing whether this item and/or activity is safe and suitable for your specific needs. InfoMommy does not make any warranties of any kind, expressed or implied, and assumes no responsibility and/or liability for any actions taken as a result of this blog post.*****
Subscribe to:
Posts (Atom)